> ## Documentation Index
> Fetch the complete documentation index at: https://docs.cedarai.com/llms.txt
> Use this file to discover all available pages before exploring further.
# SCIM
> Connect your identity provider to Cedar for automated user provisioning.
SCIM (System for Cross-domain Identity Management) automates user provisioning. Your identity provider can automatically create, update, and deactivate users in Cedar.
This page covers **creating SCIM mappings in the Admin Portal**. For technical setup in your identity provider, see the [SCIM Setup Guide](/user-docs/sso/scim/overview).
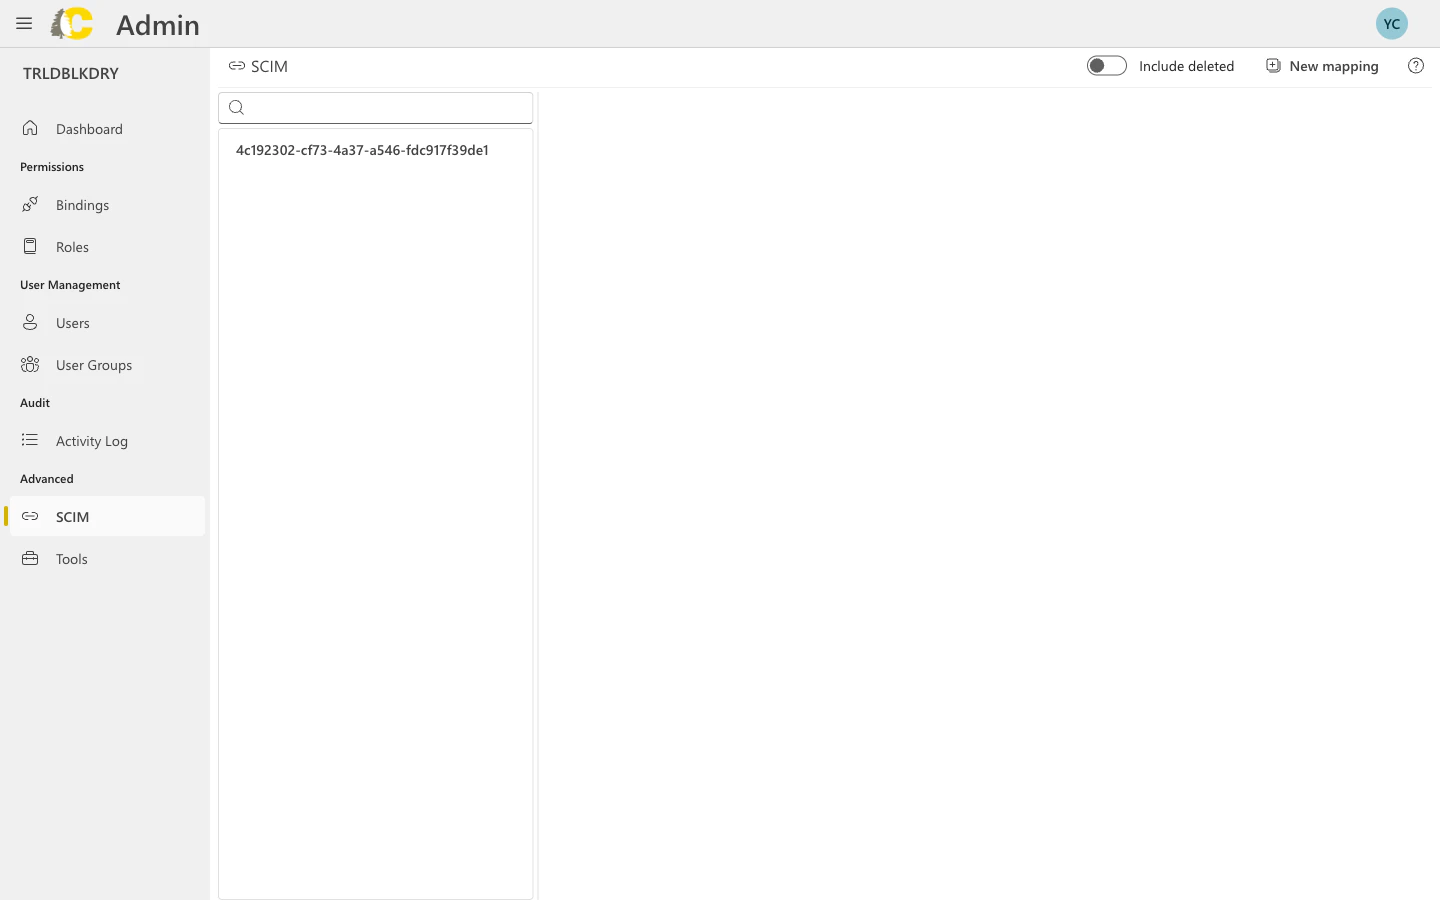 ## What SCIM does
New employees are added to Cedar automatically
User details stay in sync with your IdP
Departing employees lose access automatically
## When to use SCIM
* Your organization uses an identity provider (Azure AD, Okta, etc.)
* You have many users to manage
* You want automatic provisioning/deprovisioning
* You need to ensure timely access revocation
* You have a small number of users
* You prefer manual user management
* Your identity provider doesn't support SCIM
## Create a SCIM mapping
In your identity provider (Azure AD, Okta, etc.), find the SCIM tenant ID that will be used for provisioning.
From the SCIM page, click **New mapping**.
Paste the SCIM tenant ID from your identity provider.
Choose where users should be provisioned:
* **Organization** — users can access all carriers in the organization
* **Carrier** — users are limited to a specific carrier
Choose carefully. This determines the scope of access for all users provisioned through this mapping.
Save the mapping, then configure your identity provider to use the provided client ID and secret.
## What SCIM does
New employees are added to Cedar automatically
User details stay in sync with your IdP
Departing employees lose access automatically
## When to use SCIM
* Your organization uses an identity provider (Azure AD, Okta, etc.)
* You have many users to manage
* You want automatic provisioning/deprovisioning
* You need to ensure timely access revocation
* You have a small number of users
* You prefer manual user management
* Your identity provider doesn't support SCIM
## Create a SCIM mapping
In your identity provider (Azure AD, Okta, etc.), find the SCIM tenant ID that will be used for provisioning.
From the SCIM page, click **New mapping**.
Paste the SCIM tenant ID from your identity provider.
Choose where users should be provisioned:
* **Organization** — users can access all carriers in the organization
* **Carrier** — users are limited to a specific carrier
Choose carefully. This determines the scope of access for all users provisioned through this mapping.
Save the mapping, then configure your identity provider to use the provided client ID and secret.
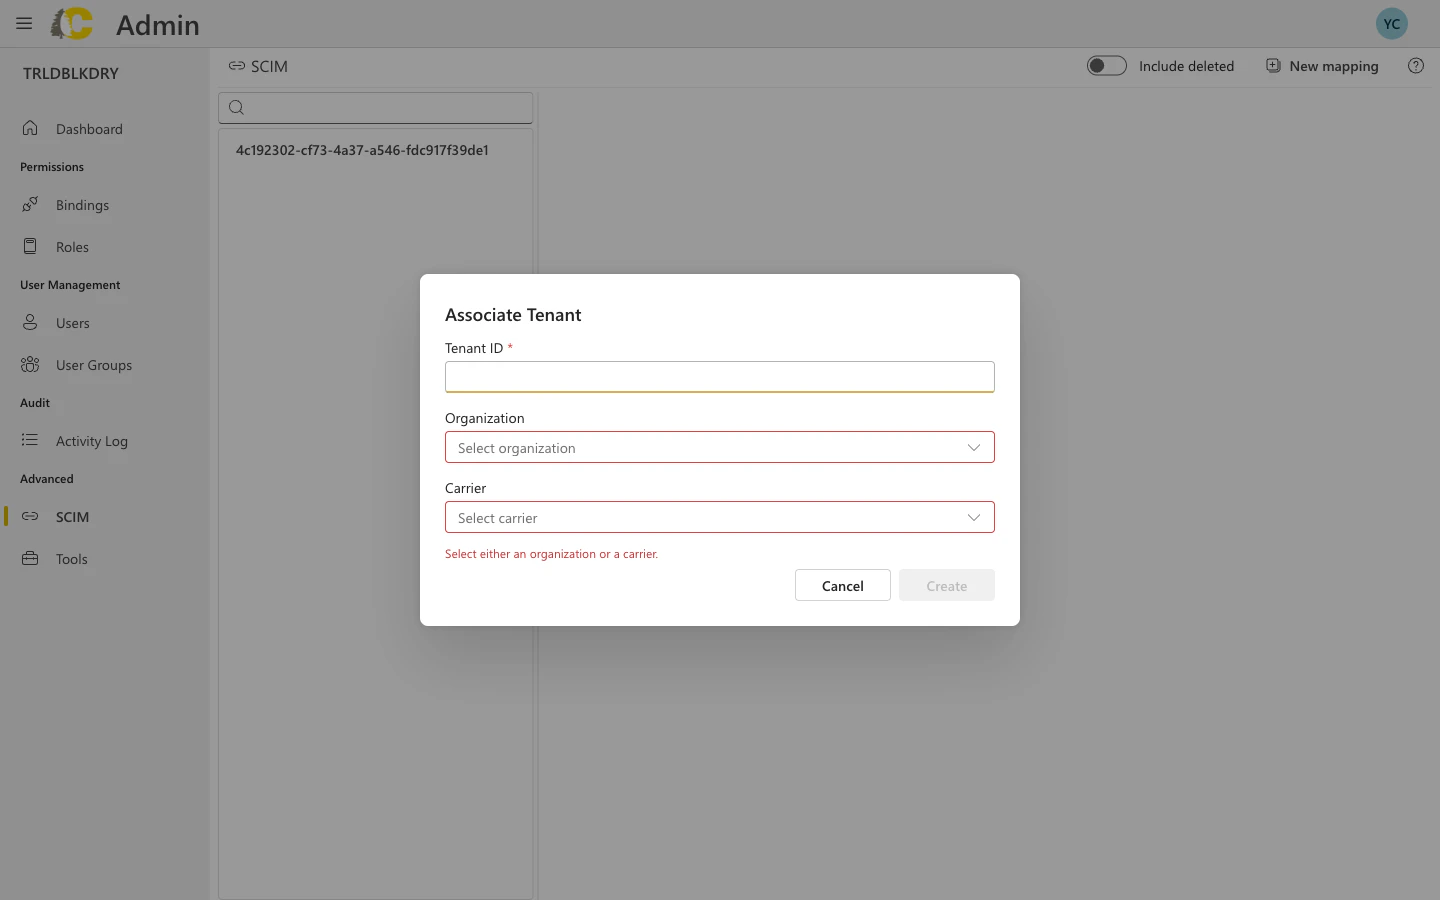 ### Dialog fields explained
| Field | Required | Description |
| ---------------- | ------------ | ------------------------------------------------------- |
| **Tenant ID** | Yes | The unique identifier from your identity provider |
| **Organization** | One required | Select if users should have access across all carriers |
| **Carrier** | One required | Select if users should be limited to a specific carrier |
You must select either an organization **or** a carrier — not both. This determines the scope of access for all users provisioned through this mapping.
## SCIM mapping details
### Dialog fields explained
| Field | Required | Description |
| ---------------- | ------------ | ------------------------------------------------------- |
| **Tenant ID** | Yes | The unique identifier from your identity provider |
| **Organization** | One required | Select if users should have access across all carriers |
| **Carrier** | One required | Select if users should be limited to a specific carrier |
You must select either an organization **or** a carrier — not both. This determines the scope of access for all users provisioned through this mapping.
## SCIM mapping details
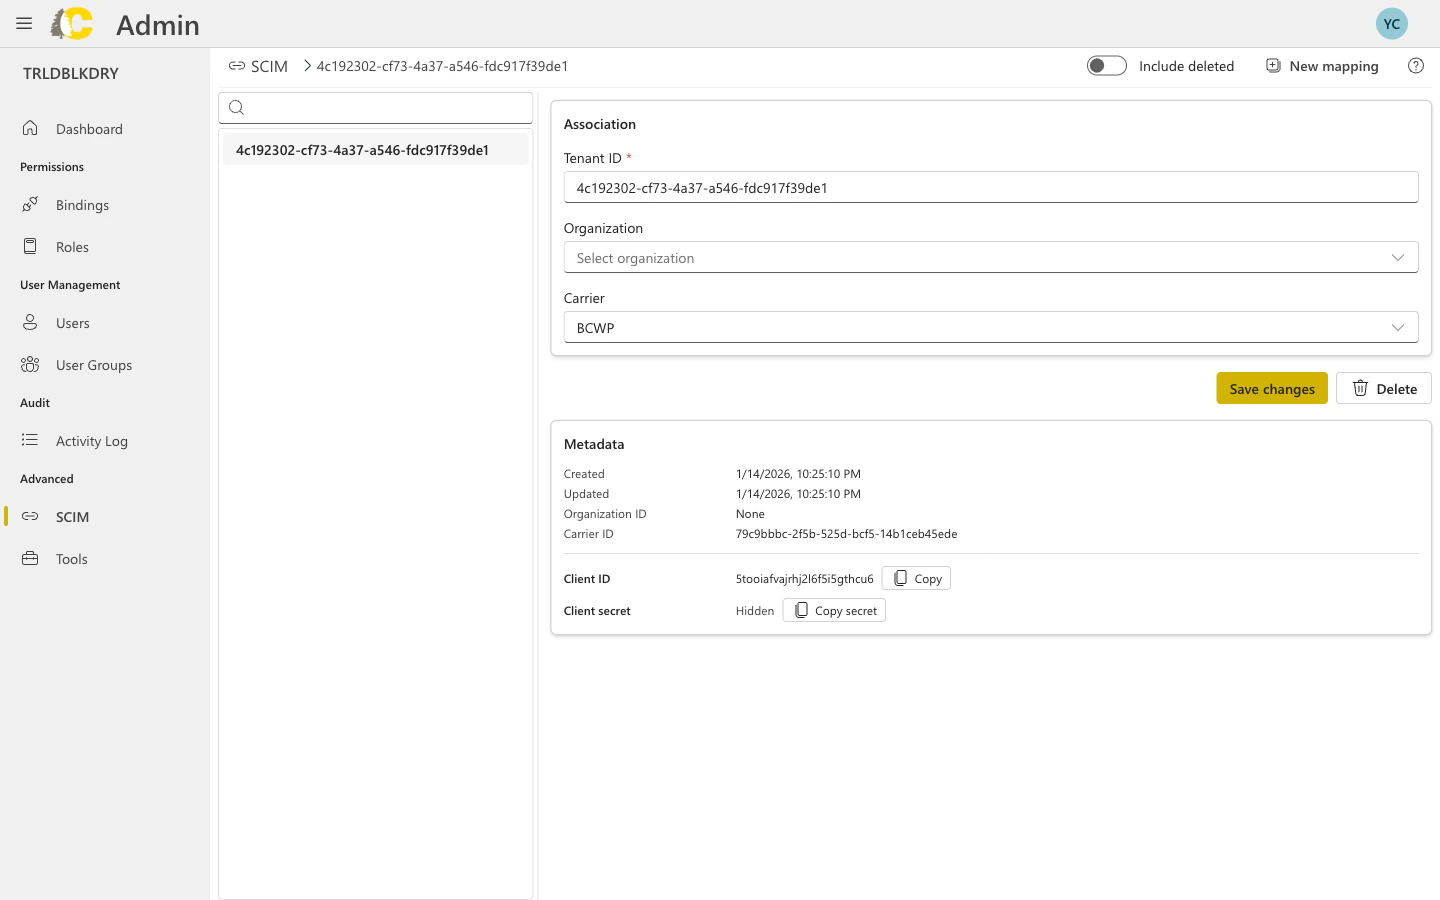 The detail view shows:
* **Tenant ID** — the identifier from your IdP
* **Organization/Carrier** — where users are provisioned
* **Client ID** — used by your IdP to authenticate
* **Client Secret** — keep this secure (click to copy)
* **Metadata** — creation and update timestamps
## Include deleted mappings
Toggle **Include deleted** to see mappings that were removed or deactivated. This is useful for:
* Auditing previous configurations
* Understanding historical setup
* Restoring accidentally deleted mappings
## Best practices
The client secret is only shown once. Copy it immediately and store it securely in your identity provider.
Before enabling SCIM for your entire organization, test with a small group of users to ensure provisioning works as expected.
After setting up SCIM, monitor the Users page to ensure users are being created correctly.
SCIM creates users, but you still need to add them to groups and create bindings for access. Consider using your IdP's group sync features.
## Related: SCIM Setup Guides
After creating a mapping here, you'll need to configure your identity provider. Use these guides:
Supported SCIM features and protocol details
Step-by-step Azure configuration
## Related: Admin Portal
View provisioned users
Organize provisioned users into teams
Grant access to provisioned users
Monitor provisioning activity
The detail view shows:
* **Tenant ID** — the identifier from your IdP
* **Organization/Carrier** — where users are provisioned
* **Client ID** — used by your IdP to authenticate
* **Client Secret** — keep this secure (click to copy)
* **Metadata** — creation and update timestamps
## Include deleted mappings
Toggle **Include deleted** to see mappings that were removed or deactivated. This is useful for:
* Auditing previous configurations
* Understanding historical setup
* Restoring accidentally deleted mappings
## Best practices
The client secret is only shown once. Copy it immediately and store it securely in your identity provider.
Before enabling SCIM for your entire organization, test with a small group of users to ensure provisioning works as expected.
After setting up SCIM, monitor the Users page to ensure users are being created correctly.
SCIM creates users, but you still need to add them to groups and create bindings for access. Consider using your IdP's group sync features.
## Related: SCIM Setup Guides
After creating a mapping here, you'll need to configure your identity provider. Use these guides:
Supported SCIM features and protocol details
Step-by-step Azure configuration
## Related: Admin Portal
View provisioned users
Organize provisioned users into teams
Grant access to provisioned users
Monitor provisioning activity