> ## Documentation Index
> Fetch the complete documentation index at: https://docs.cedarai.com/llms.txt
> Use this file to discover all available pages before exploring further.
# User Groups
> Organize users into groups so you can manage access in one place.
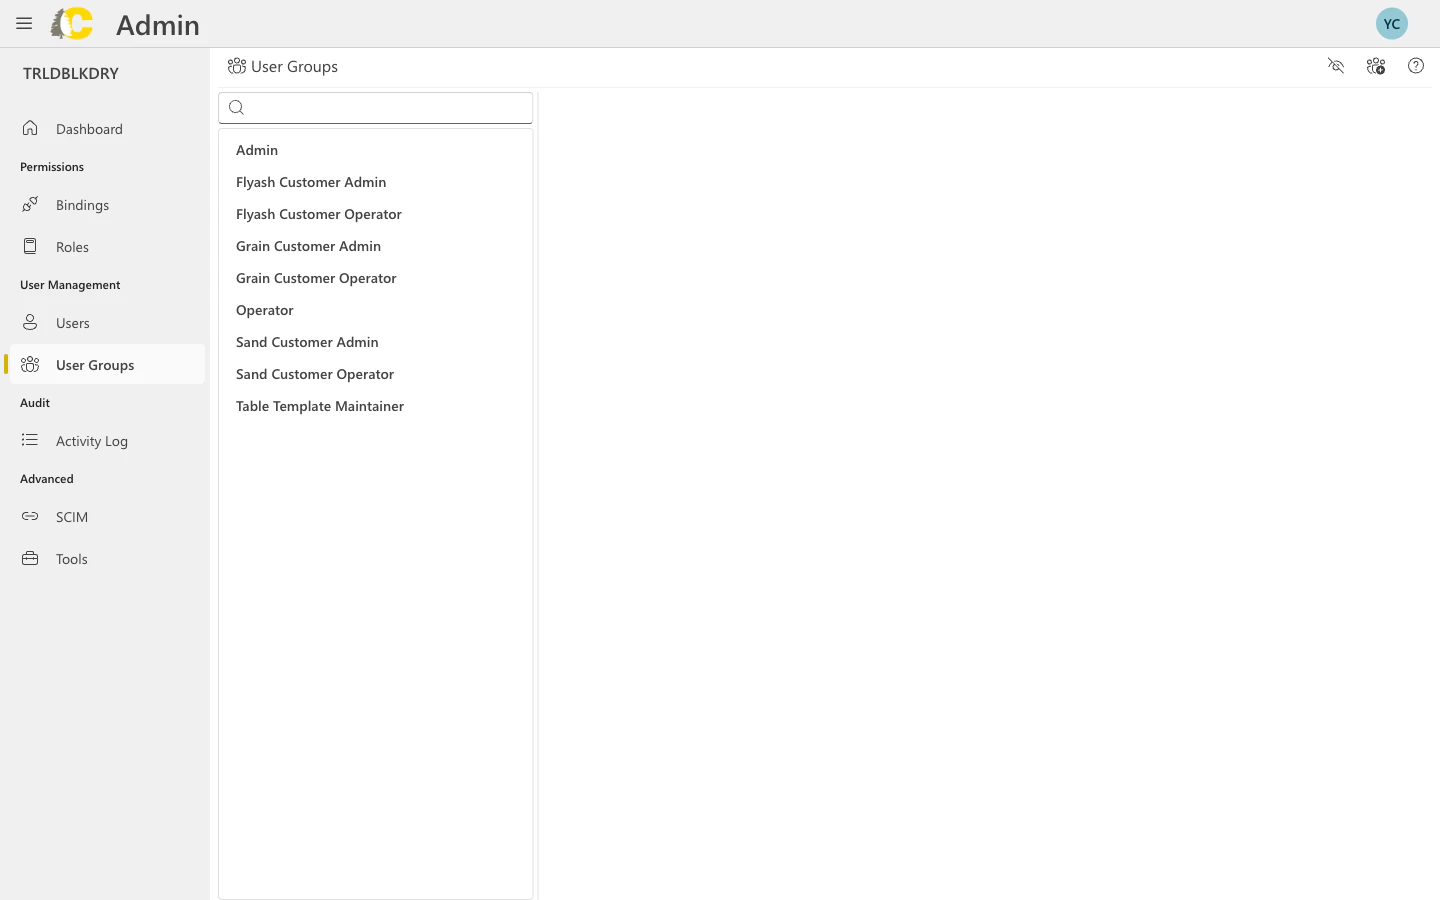
User groups let you manage access for a team at once instead of person-by-person. This is the recommended way to grant access in Cedar.
 ## Why use groups?
Change access for many users at once
Know exactly who has what access
Reduce errors from individual assignments
## Create a group
From the User Groups page or Dashboard, click the **Create Group** button.
Choose a clear, descriptive name like:
* "Customer Admins"
* "Operations Team"
* "Billing Specialists"
Use names that describe the team's function, not individual people.
Search for and add the users who should be in this group.
Create a **binding** to connect this group to a role and scope. Without a binding, the group has no permissions.
## Why use groups?
Change access for many users at once
Know exactly who has what access
Reduce errors from individual assignments
## Create a group
From the User Groups page or Dashboard, click the **Create Group** button.
Choose a clear, descriptive name like:
* "Customer Admins"
* "Operations Team"
* "Billing Specialists"
Use names that describe the team's function, not individual people.
Search for and add the users who should be in this group.
Create a **binding** to connect this group to a role and scope. Without a binding, the group has no permissions.
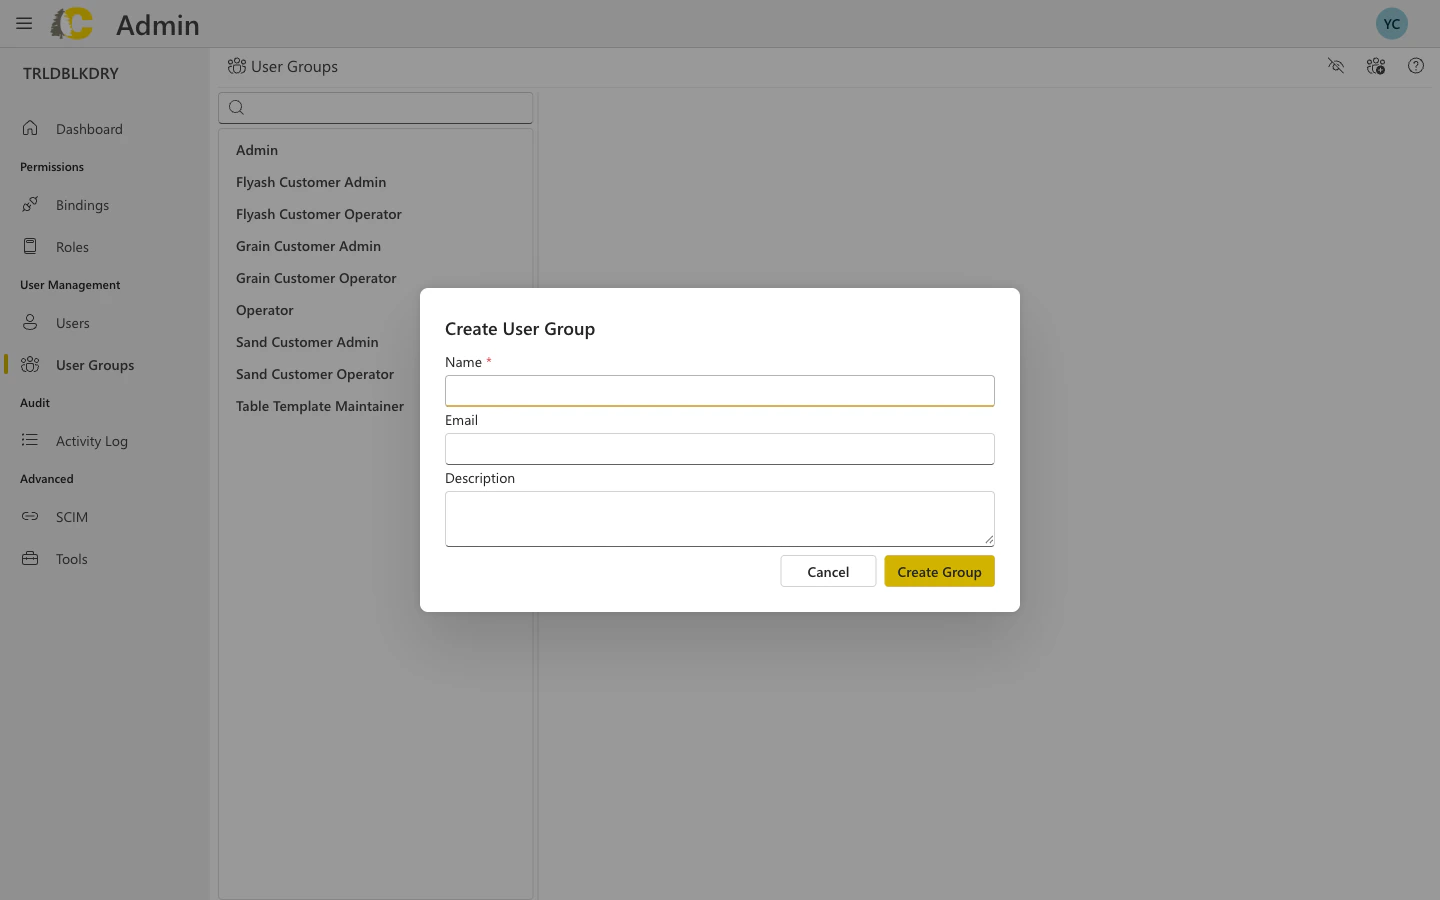 ### Dialog fields explained
| Field | Required | Description |
| --------------- | -------- | ---------------------------------------------------------- |
| **Name** | Yes | A descriptive name for the group (e.g., "Operations Team") |
| **Email** | No | Optional email address for the group |
| **Description** | No | Brief description of the group's purpose |
## Group details
### Dialog fields explained
| Field | Required | Description |
| --------------- | -------- | ---------------------------------------------------------- |
| **Name** | Yes | A descriptive name for the group (e.g., "Operations Team") |
| **Email** | No | Optional email address for the group |
| **Description** | No | Brief description of the group's purpose |
## Group details
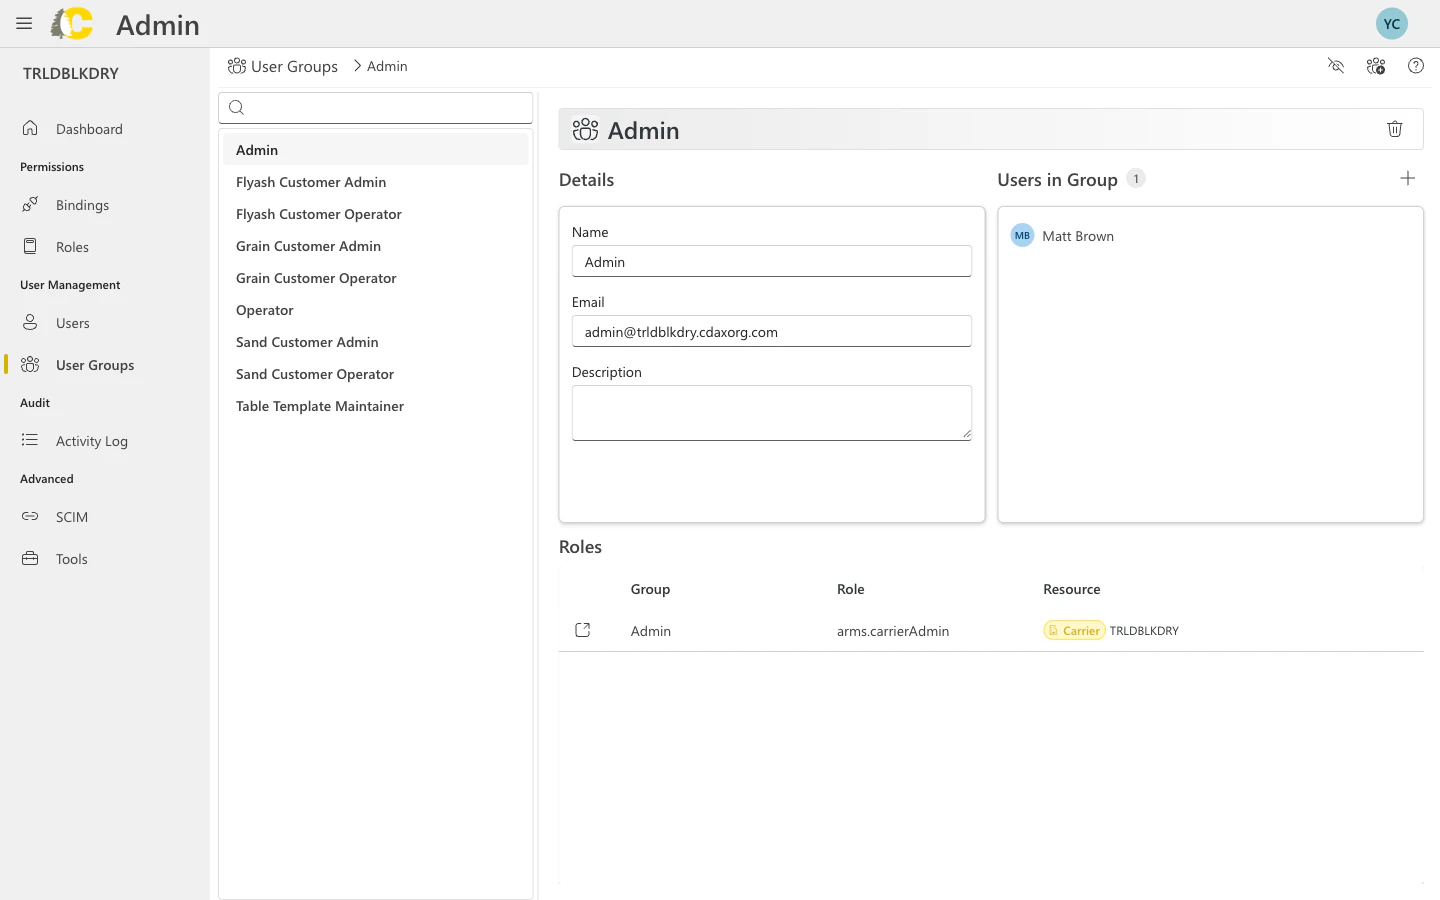 The detail panel shows:
* Group name and email
* Description
* Role assignments (via bindings)
* Members in the group
## Add or invite users to a group
Users are invited to Cedar through the User Group detail page. This ensures every user has proper access from the start.
Click on a group to open its detail panel.
In the **Users in Group** section, click the **+** button.
Type user email addresses and click **Add** for each one.
The detail panel shows:
* Group name and email
* Description
* Role assignments (via bindings)
* Members in the group
## Add or invite users to a group
Users are invited to Cedar through the User Group detail page. This ensures every user has proper access from the start.
Click on a group to open its detail panel.
In the **Users in Group** section, click the **+** button.
Type user email addresses and click **Add** for each one.
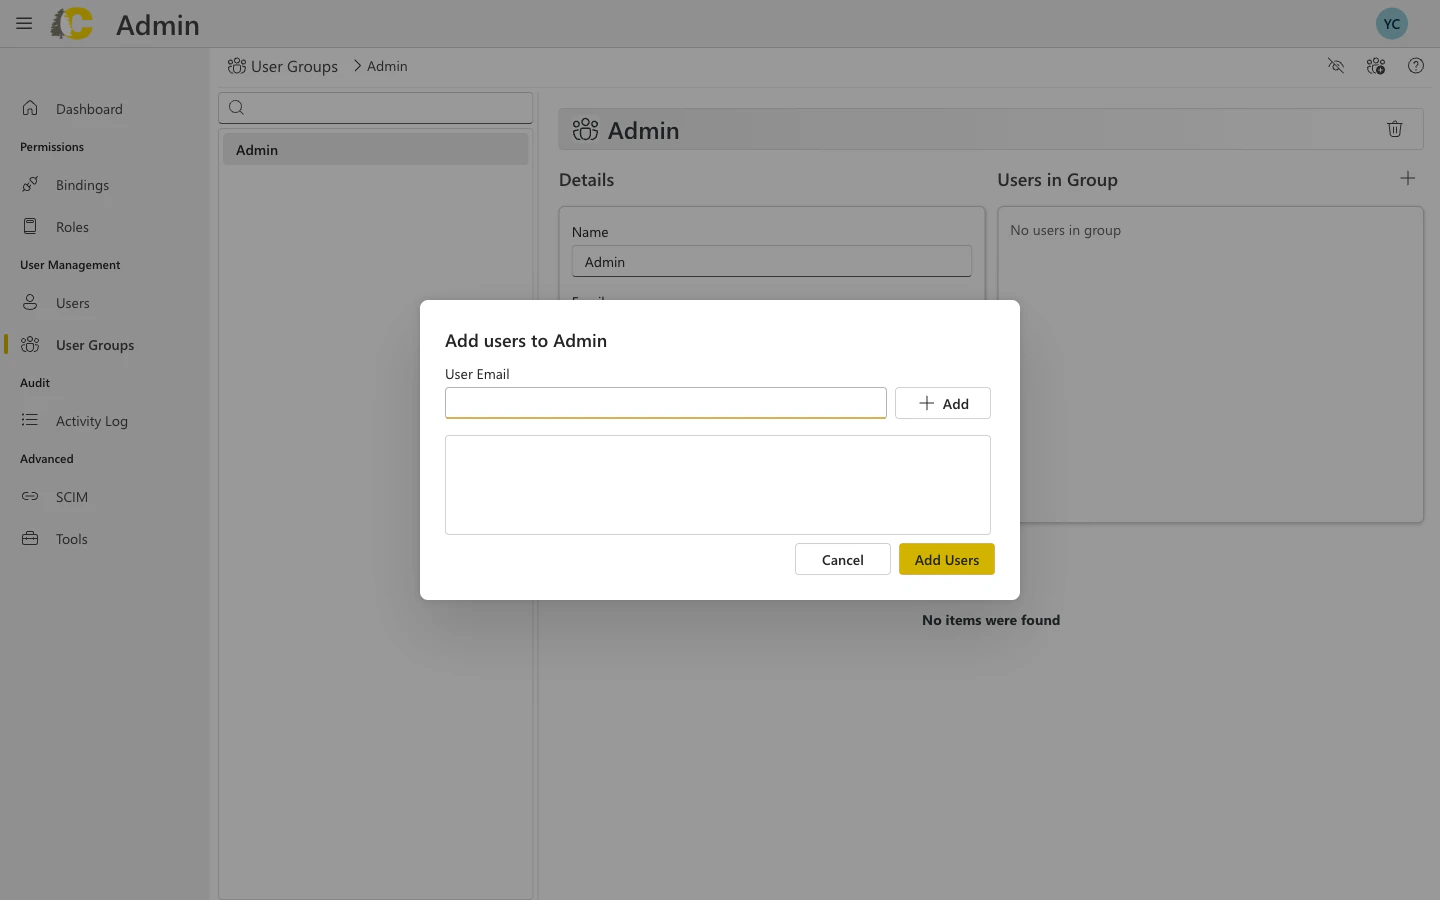 Click **Add Users** to complete. New users receive an invitation email; existing users are added immediately.
For details on user status and the invitation process, see the [Users documentation](/user-docs/admin/users).
## Best practices
Good names describe the team's function clearly. Avoid generic names like "Team 1" or names that include specific people.
| ✅ Good | ❌ Avoid |
| ------------------- | ----------- |
| Customer Admins | Admin Team |
| Billing Specialists | John's Team |
| Operations - West | Group 1 |
Always assign access through groups, even if there's only one person. This makes it easy to add more people later.
If different teams need the same role but on different scopes (e.g., different customers), create separate groups for each.
A group without a binding has no permissions. After creating a group, always create a binding to grant access.
## Related pages
Connect groups to roles
Define what groups can do
Manage individual accounts
Key terms explained
Click **Add Users** to complete. New users receive an invitation email; existing users are added immediately.
For details on user status and the invitation process, see the [Users documentation](/user-docs/admin/users).
## Best practices
Good names describe the team's function clearly. Avoid generic names like "Team 1" or names that include specific people.
| ✅ Good | ❌ Avoid |
| ------------------- | ----------- |
| Customer Admins | Admin Team |
| Billing Specialists | John's Team |
| Operations - West | Group 1 |
Always assign access through groups, even if there's only one person. This makes it easy to add more people later.
If different teams need the same role but on different scopes (e.g., different customers), create separate groups for each.
A group without a binding has no permissions. After creating a group, always create a binding to grant access.
## Related pages
Connect groups to roles
Define what groups can do
Manage individual accounts
Key terms explained