

Open the Interchanges screen
Tap Interchanges in the bottom tab bar. If it is not there, tap More, then choose Interchanges.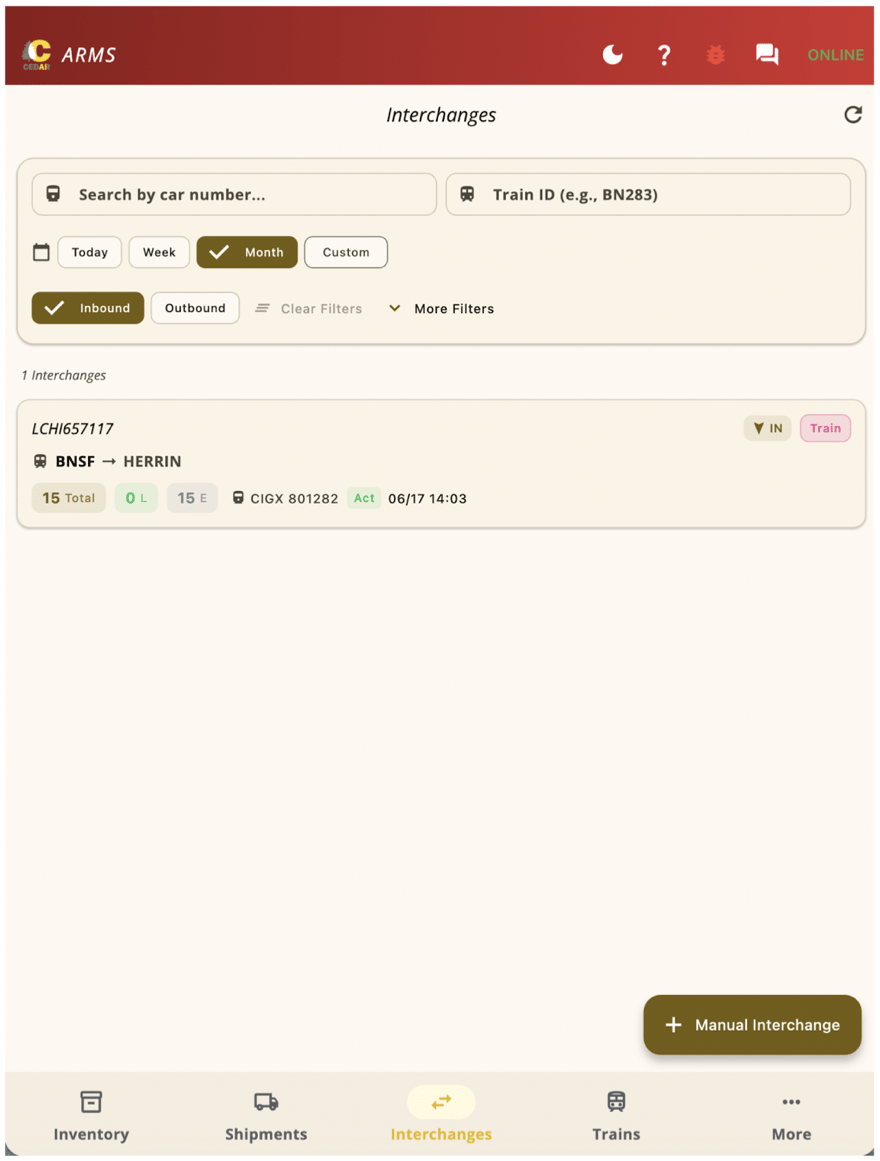
Interchanges list. Filter by day, inbound or outbound, car number, or train ID. Tap + Manual Interchange to create one.
- The top of the screen shows the most recent interchanges.
- Use Today / Week / Month, Inbound / Outbound, and search by car number or train ID to narrow the list. Tap More Filters for additional options.
- Each card shows the train ID, the route (from → to), totals (L = loaded, E = empty), the lead car, and the time.
- Tap any card to open its details.
View interchange details
The compact view is the default — one line per car.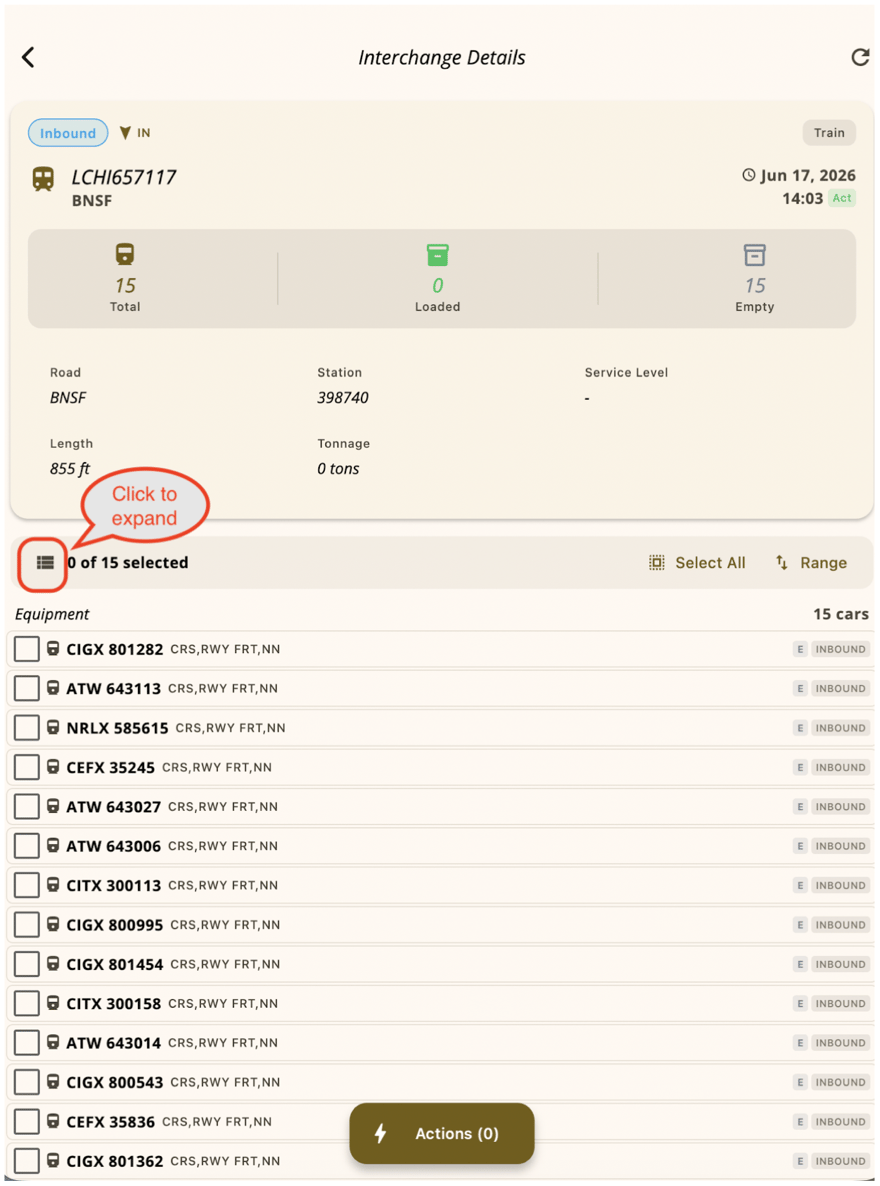
Compact interchange details. Totals, length, tonnage, and connecting road sit above the consist. Tap the view-toggle icon to expand rows.
- Totals — total cars, loaded count, and empty count.
- Length and tonnage for the whole interchange, plus the connecting road, station, and service level.
- Tap the view-toggle icon on the left of the yellow selection bar to switch to the expanded view.
Expanded view
Expanded rows show extra detail: commodity, ICHR timestamp, customer codes, and block.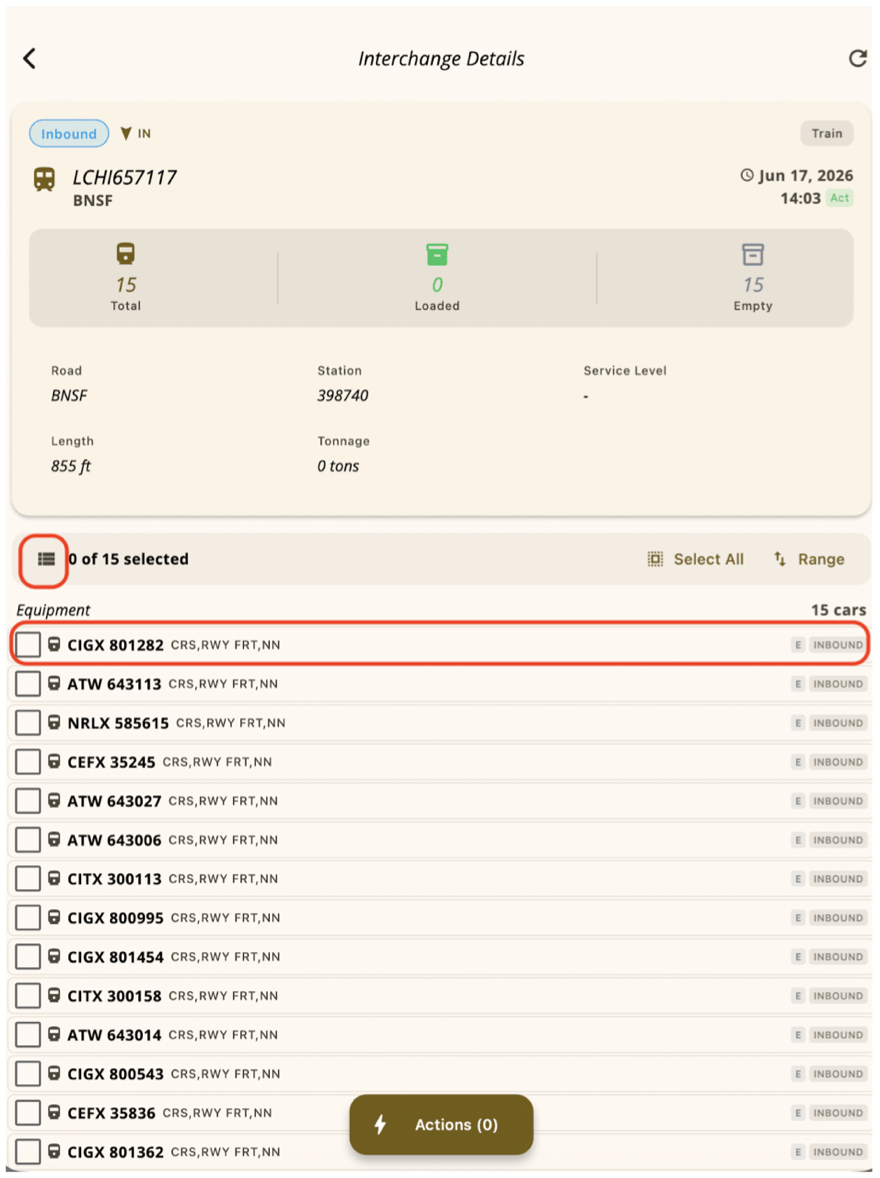
Expanded rows. Tap the view-toggle icon again to return to the compact view.
Receive an interchange
Bring selected cars online with Inbound Interchange. Unchecked cars are left off the consist.Select the cars to receive
Exclude cars you do not want
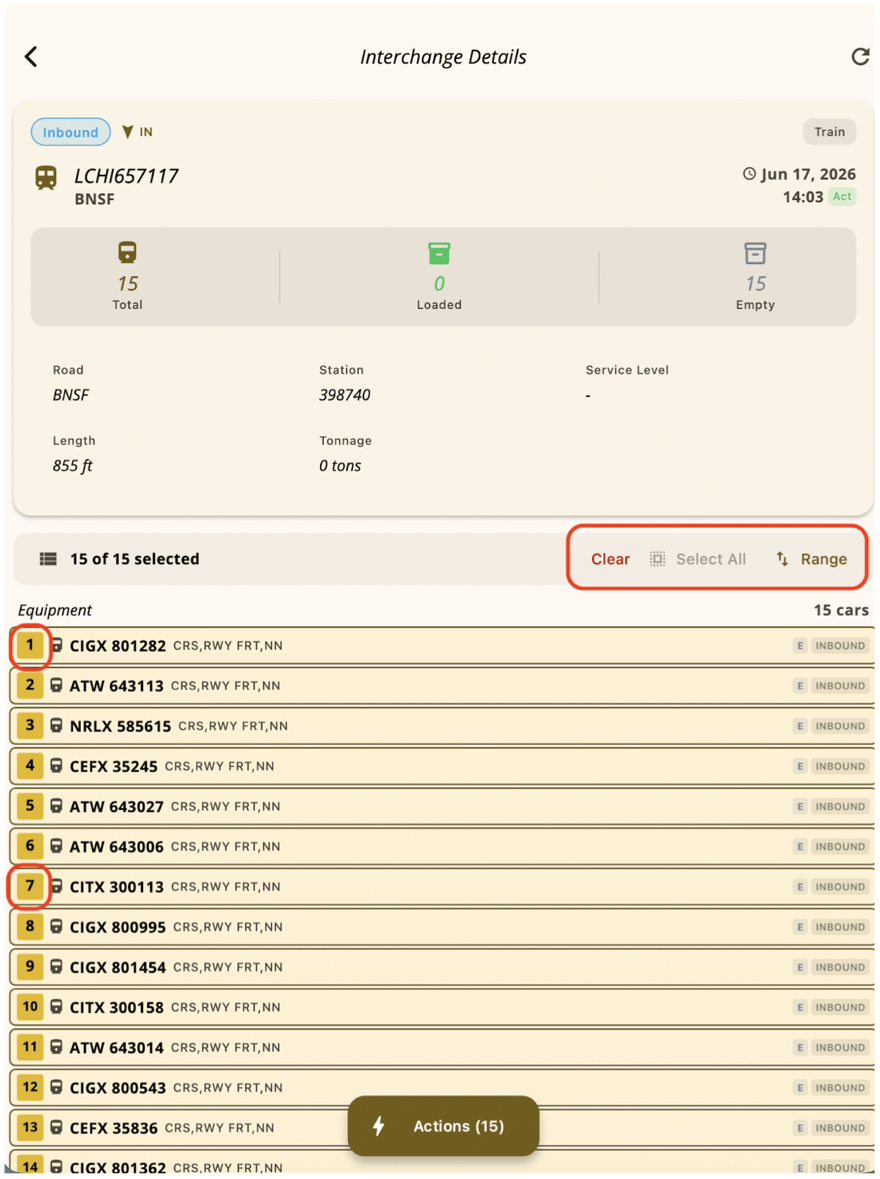
Select All picked every car. Clear removes the selection. Unchecked rows will not be received.
Open Actions and receive
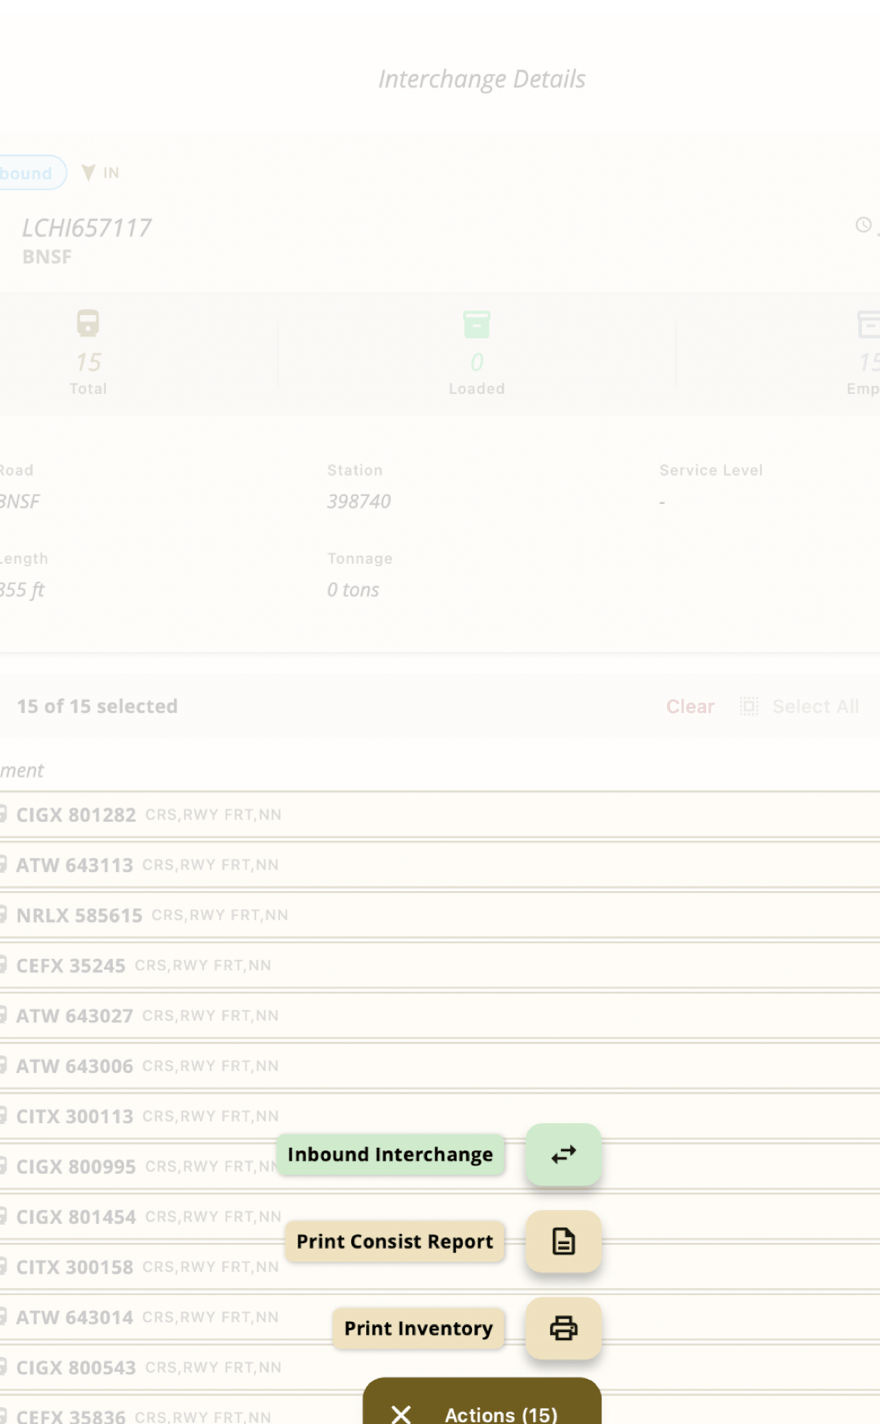
Actions menu on an interchange. Inbound Interchange brings the selected cars online. You can also print a consist report or inventory paperwork.
Create a manual interchange
Tap + Manual Interchange on the list when you need to enter a train that is not already in the app.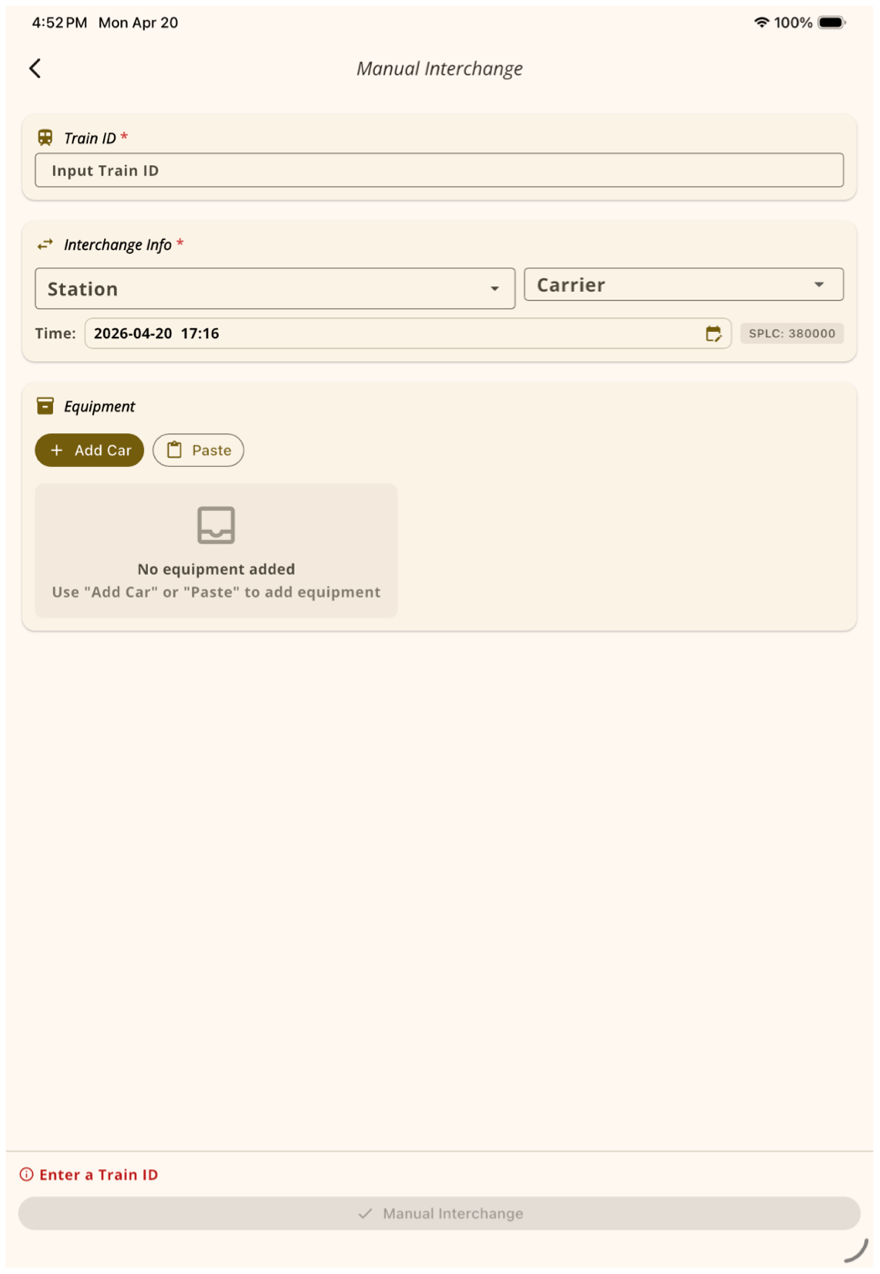
Manual Interchange form. Train ID, station, and carrier are required. Add cars one at a time or paste a list.
- Train ID (required) — the inbound train identifier.
- Station and Carrier (required) — where the interchange happens and the connecting railroad. Time and SPLC fill in automatically and can be edited.
- Tap Add Car to type cars one at a time, or Paste to drop in a list of car IDs.
- The Manual Interchange button at the bottom turns active when the required fields are filled. Tap it to create the interchange.