

Browse the station list
The Inventory tab lists every station in your network. Tap the star on the right to favorite a station — favorites move to the top.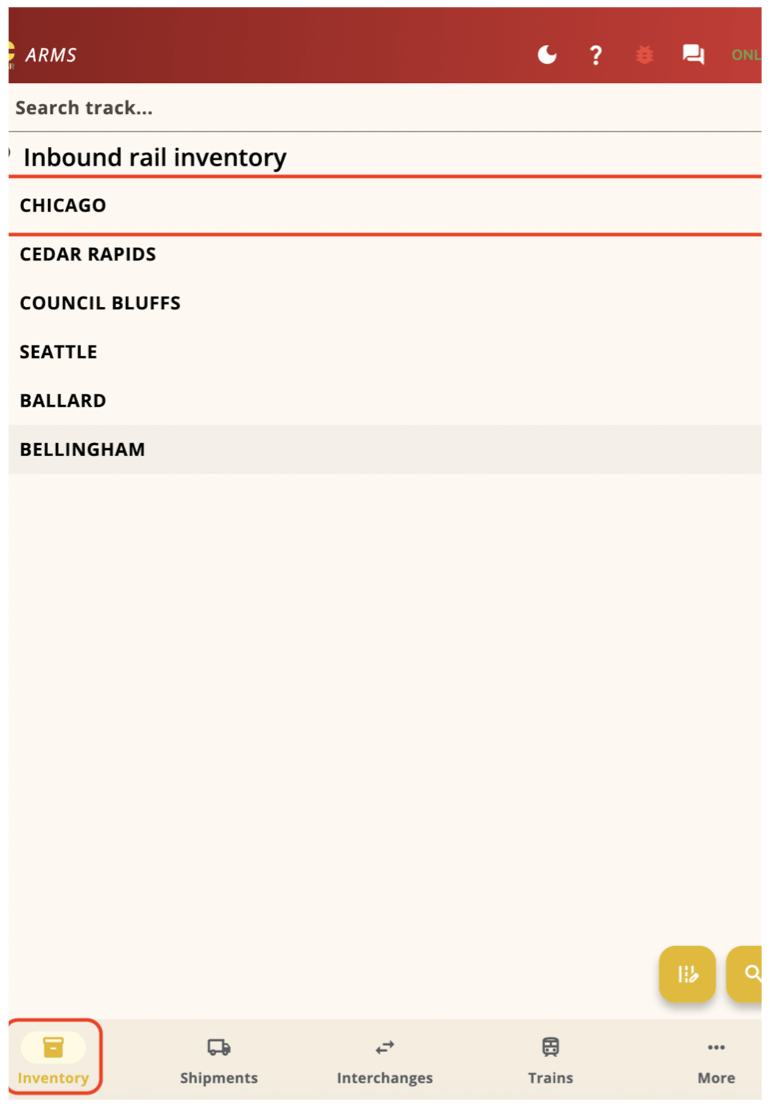
Station list on the Inventory tab. Chicago is highlighted.
Expand a station’s tracks
Tap the arrow to the left of a station name to expand it. Tracks appear inline so you can see what’s there without leaving the list.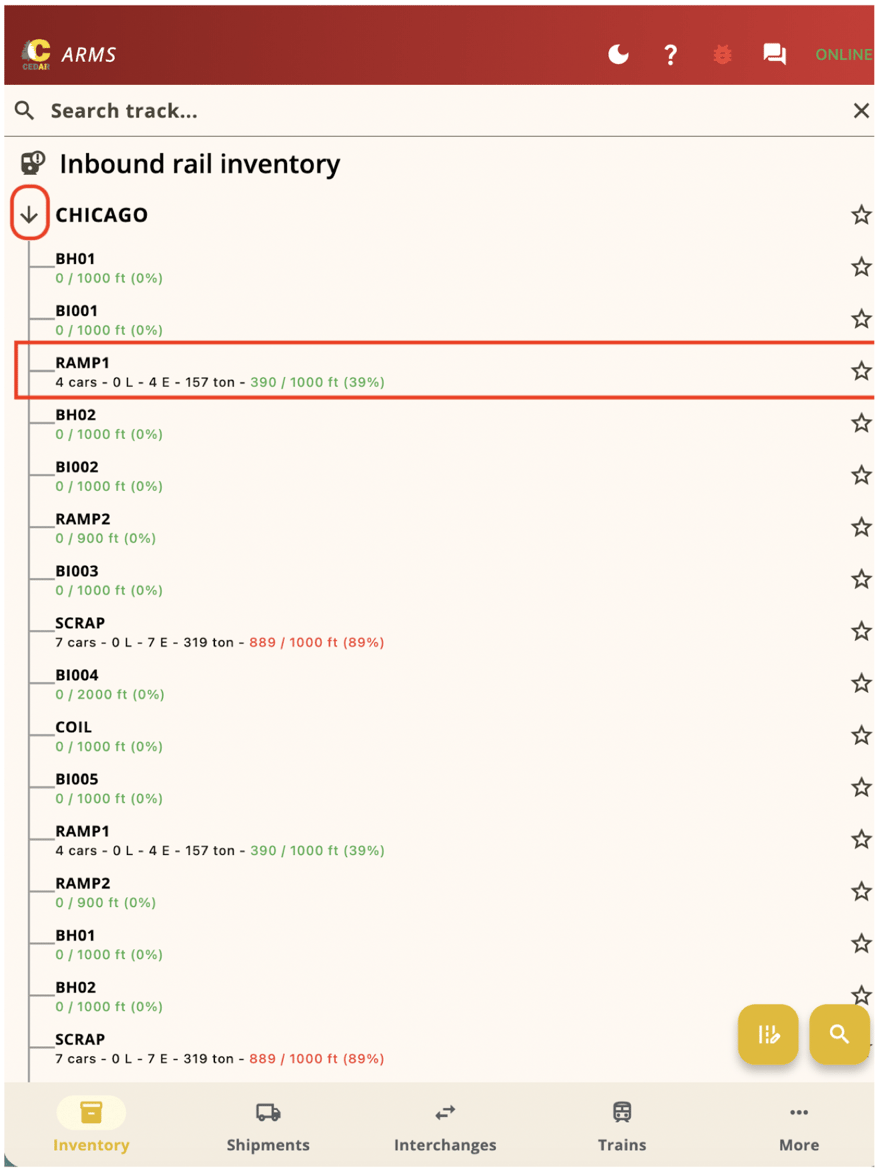
Chicago expanded. Each track shows current length and capacity, for example 0 / 1000 ft (0%).
- The arrow flips to down when the station is expanded.
- Each track lists its current length and capacity.
- Tap a track name to open that track, or tap the arrow again to collapse the station.
Open a station
To work the cars in a station, tap the station name (not the arrow). The full inventory screen opens. Cars are grouped by track. Each track has a yellow header bar with the track name.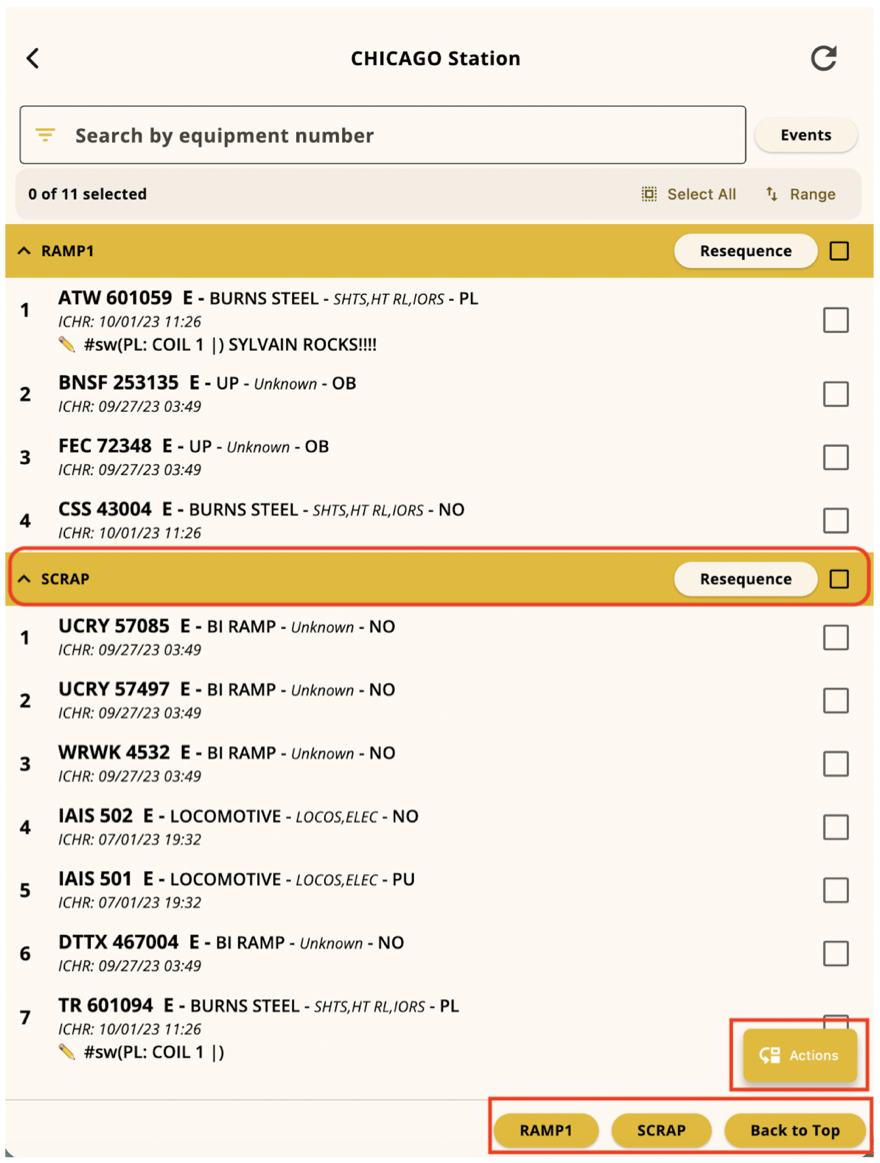
Inside Chicago Station. Track headers are yellow. Use Actions for selected cars, and the track buttons at the bottom to jump.
- Track header — tap the arrow to collapse or expand the track. Tap the checkbox on the right to select every car on that track. Tap Resequence to change car order.
- Actions — opens the menu for selected cars (Move Cars, Print Paperwork, Load Car, and more).
- Track navigation — swipe up or down to see more cars and tracks.
Scroll between tracks
The car list is one long, scrollable list. The current track header sticks to the top so you always know which track you are looking at.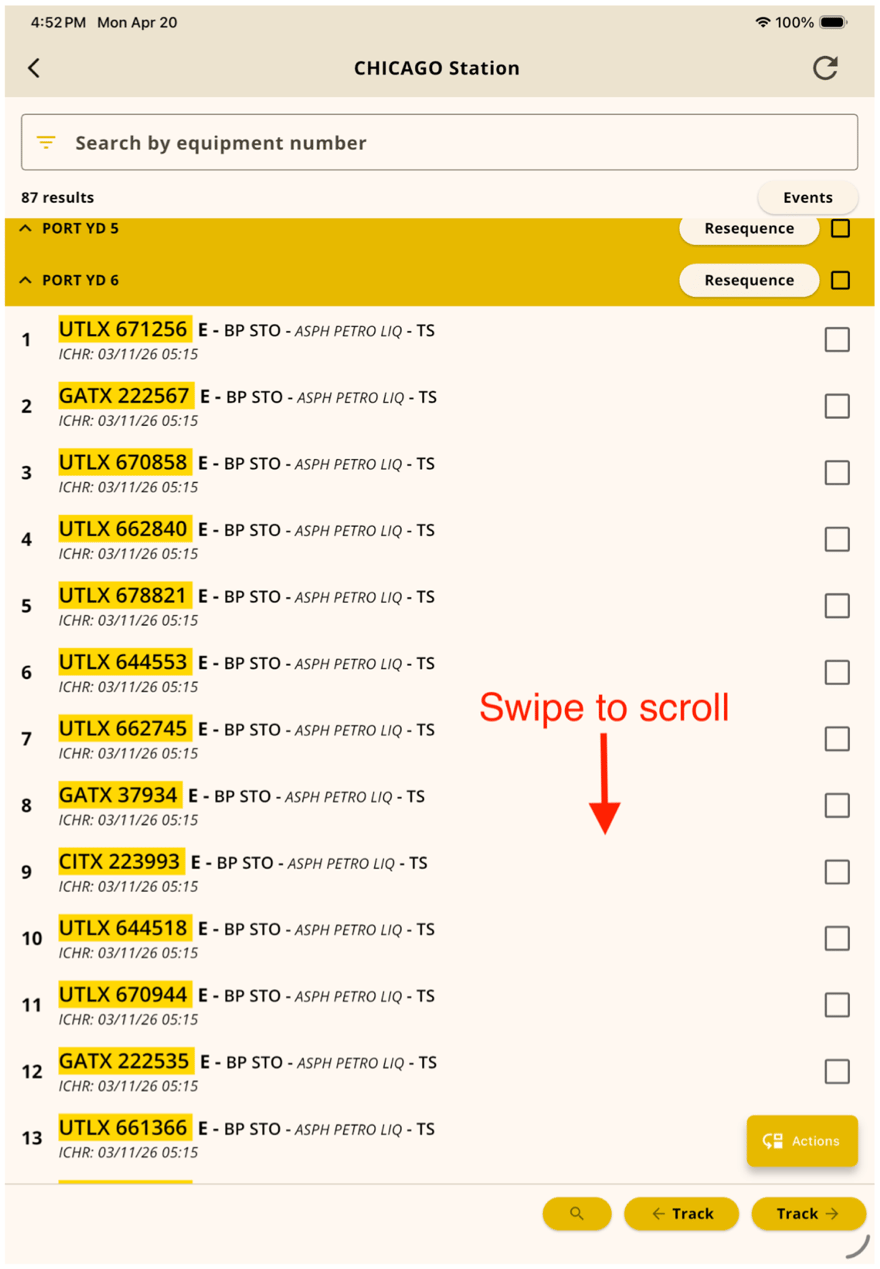
Swipe to scroll. Use Track left and right at the bottom to jump instead of scrolling.
Select cars
Tap a car to select it. Selected rows highlight, and a number appears in the right-hand checkbox to show selection order. Tap the row again to deselect it.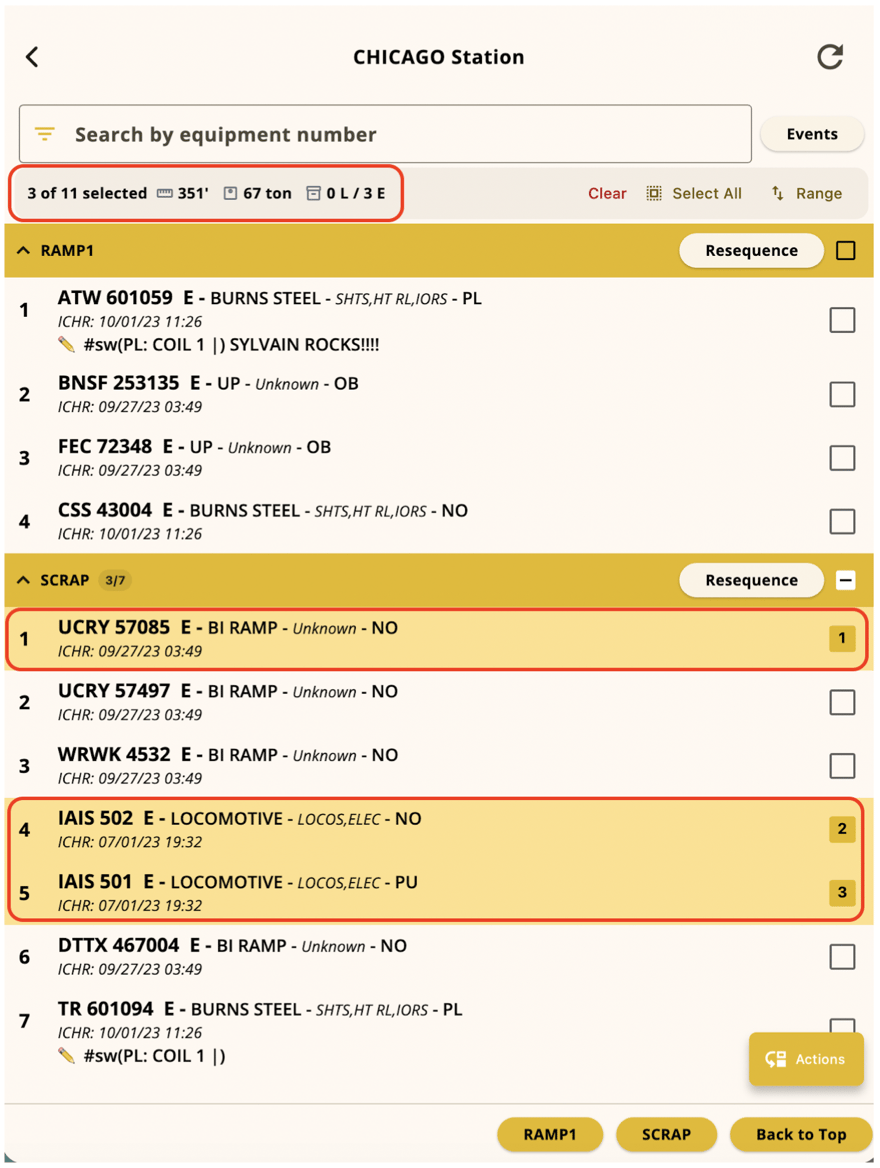
Three cars selected on SCRAP. The summary at the top shows length, weight, and loaded vs empty.
Select every car on a track
Tap the checkbox on the right end of the track header. The checkbox fills in and every car on that track is selected.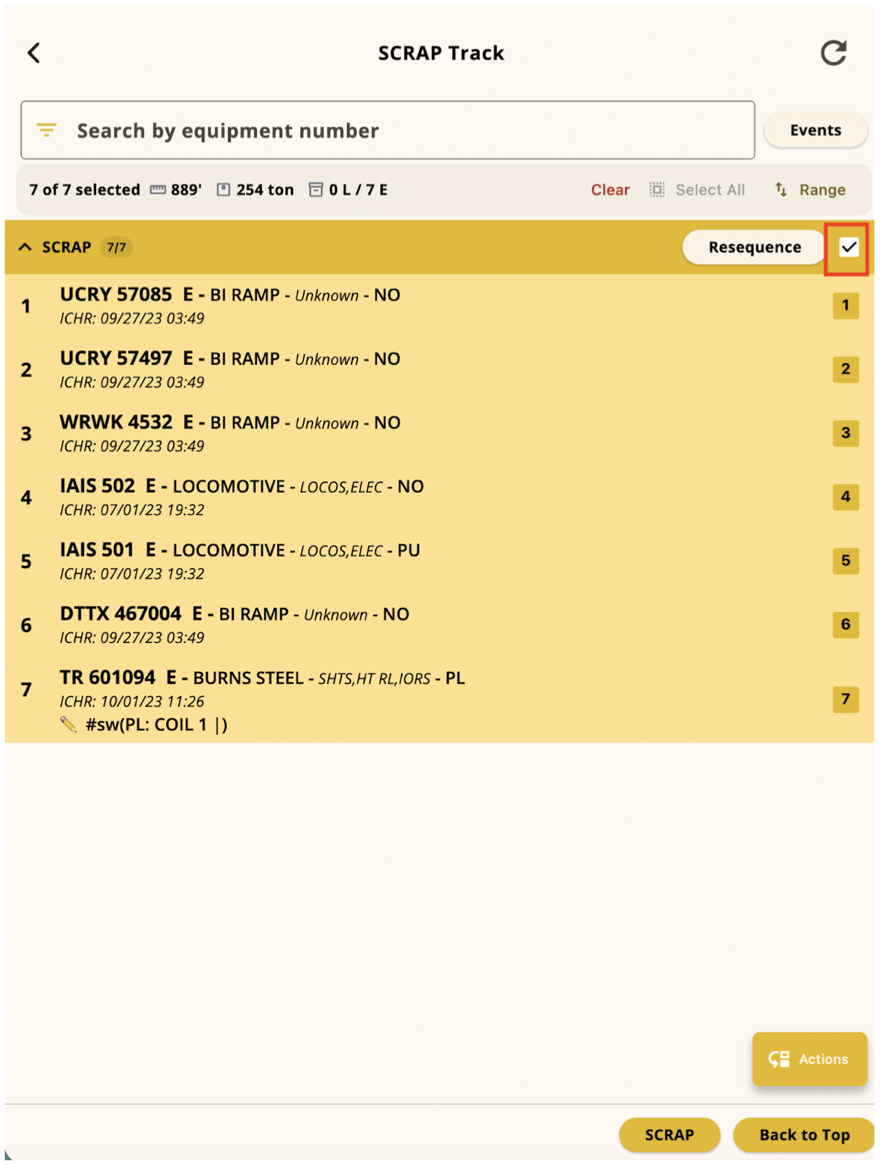
The SCRAP header checkbox is checked. The header shows how many cars on that track are selected.
Move cars
Once one or more cars are selected, move them to another track.Open the Actions menu
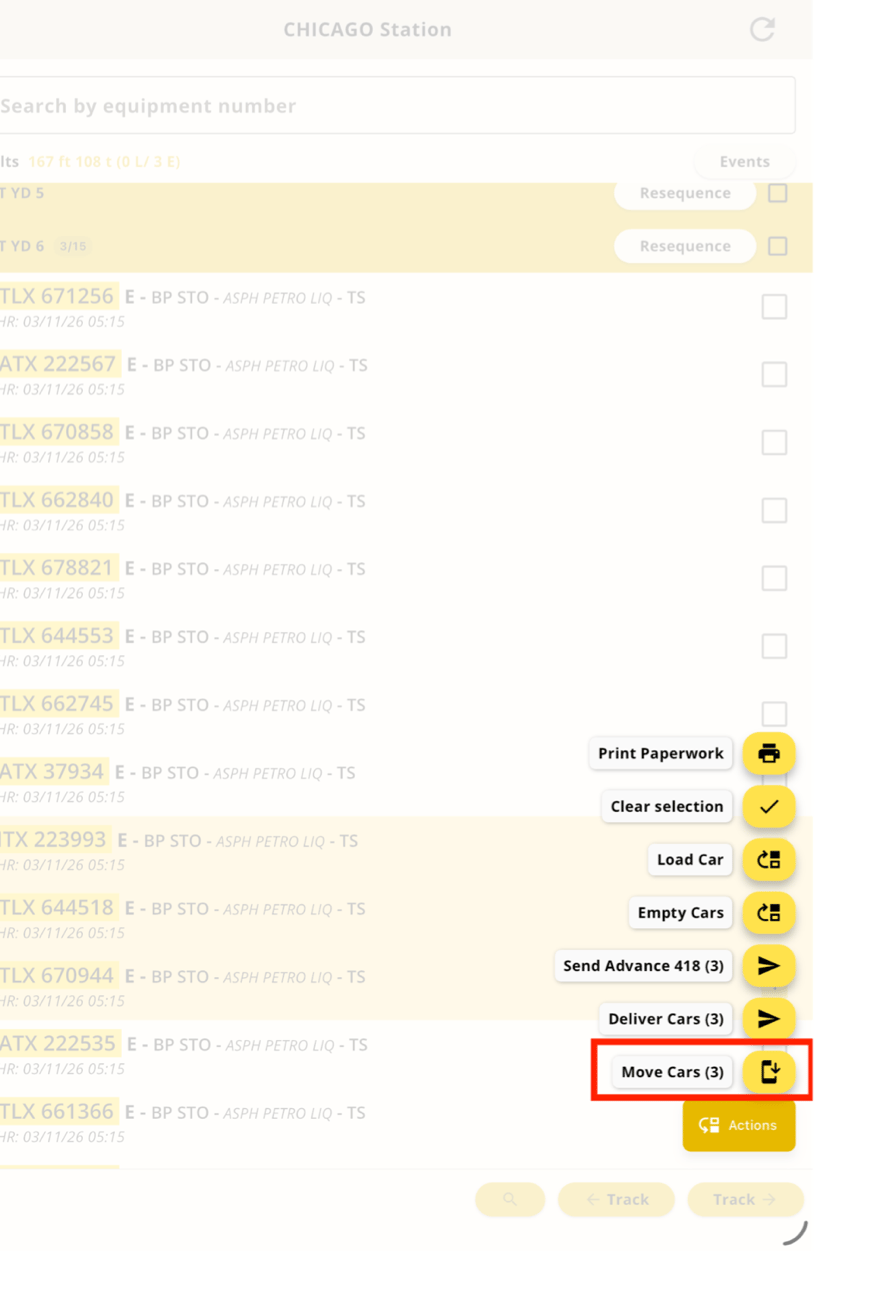
Actions menu with Move Cars highlighted. The count matches the current selection.
Choose the destination
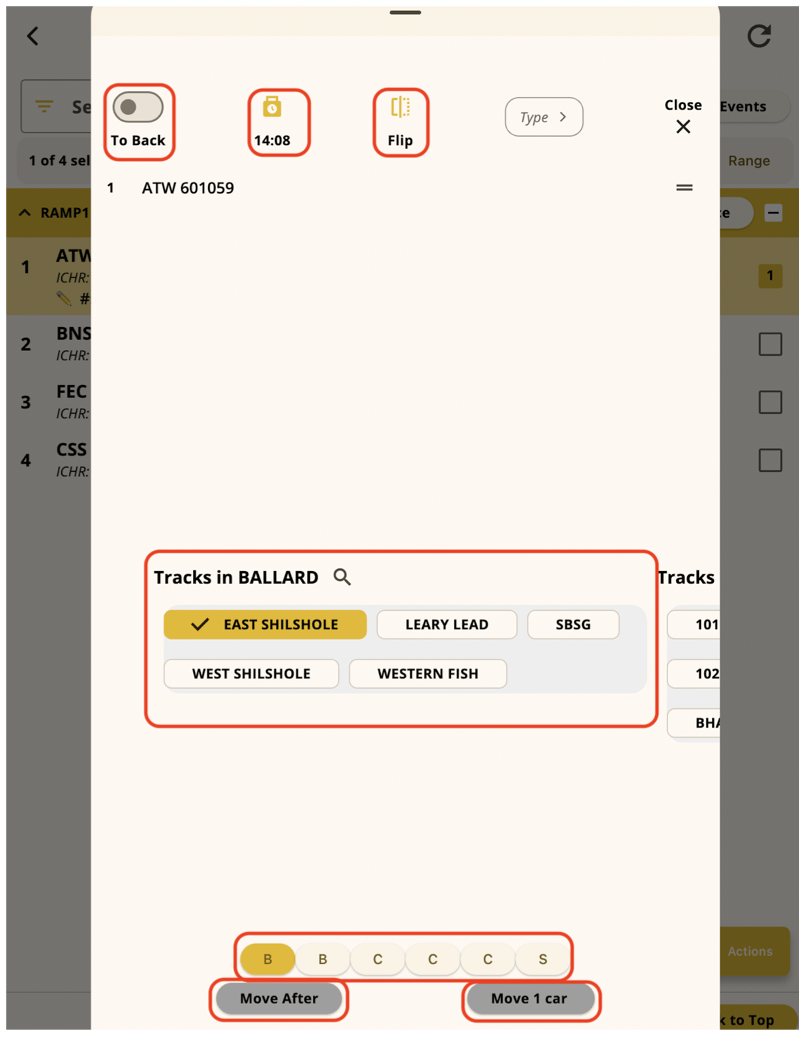
Move Cars. Reorder cars with the handle, pick a destination track, or use the alphabet jump. Swipe left or right to change station.
- Drag the handle on the right to reorder cars if needed.
- Scroll the destination tracks, or tap a letter to jump to tracks that start with that letter.
- Swipe left or right anywhere in the dialog to switch to a different station.
- Tap the clock icon to edit the move time.
Confirm the move
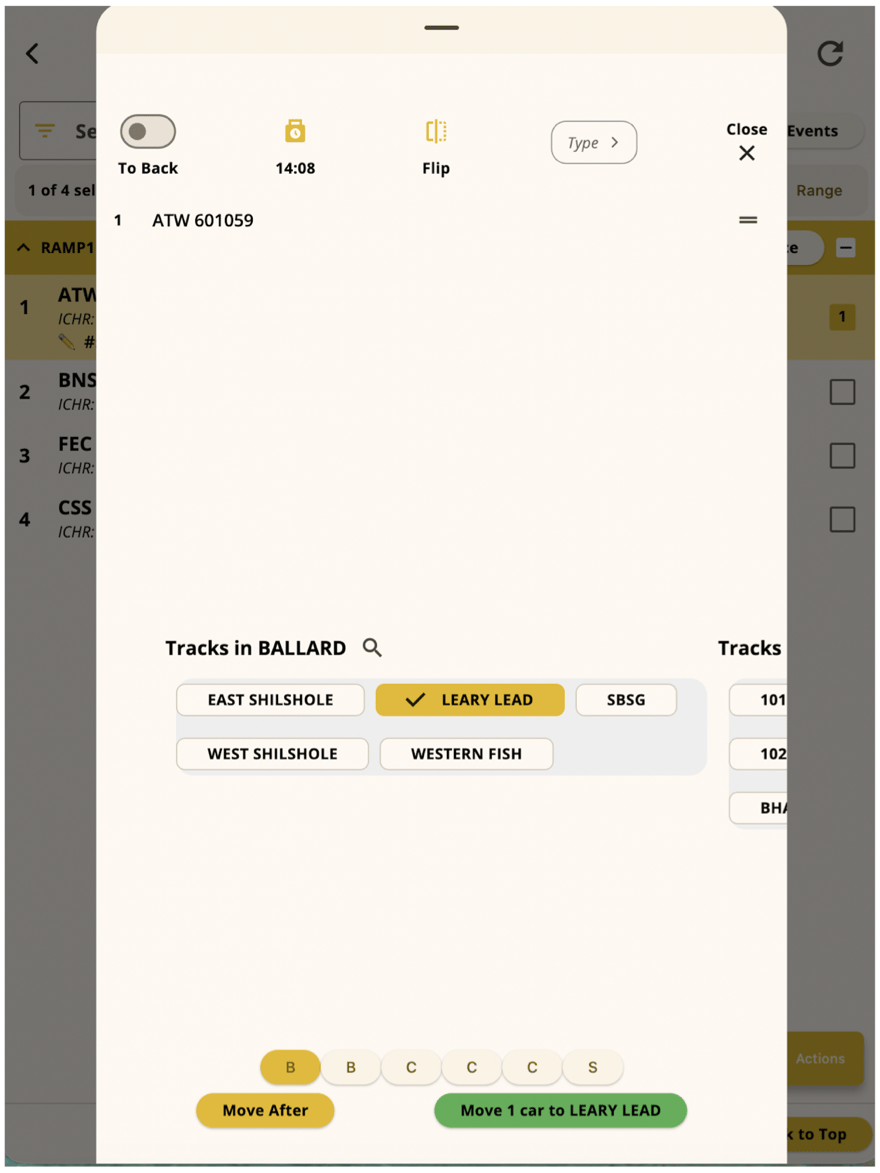
Leary Lead is selected. The green button confirms the move.